Keycap jig build guide
This article describes how to make a keycap sanding jig using a model from the dmote-keycap software project. The jig is for finishing the concave tops of custom keycaps.
Visit the dmote-keycap project on GitHub and read its documentation for how to get printable models of jigs and keycaps. Tweak the documented parameters for your needs, including the number of lanes on your jig. I recommend about six lanes.

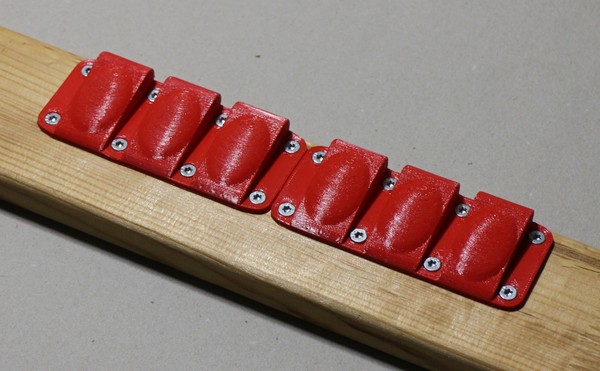
Two jigs of three lanes each
Use wood screws with conical caps, about 6–8 mm top diameter (¼”), to mount your jig to a scrap piece of wood.
The ideal board for this is long enough that you can clamp it to a workbench without the clamps getting in the way of your work. It’s also thick and wide enough for your sandpaper strips to wrap around it with a couple of inches of overlap, so you can shift the strips forwards or backwards if you sand so many keycaps that the paper wears out.

Cut strips of sandpaper and wrap them around each lane. A rotary knife, cutting from the smooth back, is better for this than a pair of scissors. The exact dimensions aren’t important as long as the paper stays roughly in place and covers each rounded pad.

Example choice of grit
If you are using multiple jigs and/or multiple-lane jigs, use different grits of sandpaper to save time. Prefer the water-resistant “wet sanding” variety for plastic.
Attach the strips of sandpaper by the force of the clamps, or by tape. Slack is OK; that just reduces the wear on the paper.

Put about 4 mm of water in a cup on your workbench. Grab a keycap, dunk its top face in the water and get to work. If your bowls are not perfectly round, and by default they are not, then make sure you are aligning your keycaps properly. With default settings, the key row axis of the cap goes along the lane on the jig, not across.

Workpiece highlighted in white
Applying gentle, even pressure with both hands and varying your grip, recall the words of Frank Zappa: “a vigorous circular motion hitherto unknown to the people of this area, but destined to take the place of the mudshark in your mythology, here it goes now, the circular motion: Rub it!”
You can also try a figure eight, or just flipping the cap itself around by 180° once, to even out the wear. Rubbing straight away from and toward yourself is faster but can make the shape of the bowl less pronounced.

Before and after sanding the bowl
With six lanes, like those pictured in this article, it takes seconds to go from a fresh print to a smooth top surface that will stay relatively clean.

Fully sanded, before and after painting
Sanding the convex sides is easier and you don’t need a jig for it. Painting is easy, and so is finishing the job with a P2000-grit sanding sponge.